
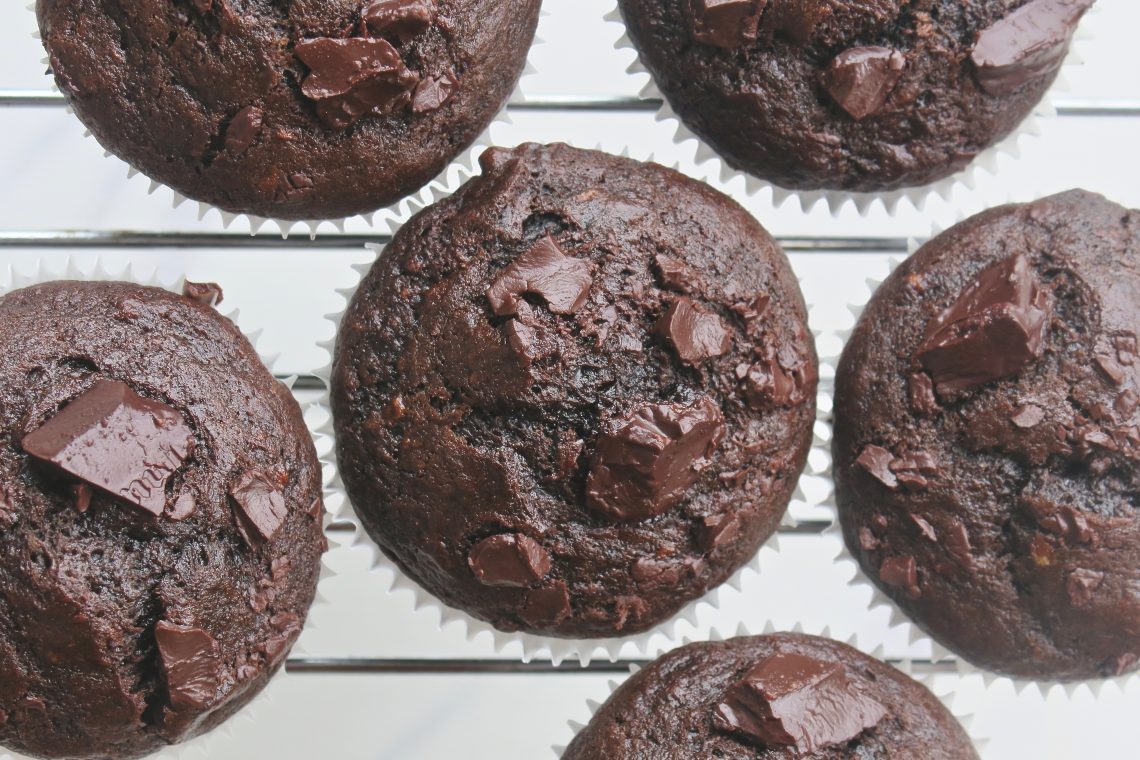
Chocolate Muffins are great but banana chocolate chunk muffins are even better! This recipe shouldn’t take you more than 20 minutes to put together and once it’s made? Yeah, it’ll take half that time to polish off!


Bananas are integral to this recipe and you are definitely going to be able to taste the banana in the muffins, but that’s a good thing! 1 and a half bananas might sound annoying but I think that’s the sweet spot for these muffins. Not to worry, the remaining half works GREAT as a pre-muffin baking snack (Yes, that’s definitely a thing).
When it comes to choosing bananas you want to go for really ripe, almost gross looking ones. While you might usually throw these guys out, they’re amazing for most baked banana goodies including this one. Over-ripe bananas are a lot sweeter and smush up a whole better than their prettier counterparts. If you don’t have ripe bananas and you really want to make these, you can ripen them in the oven. Stick them into an oven at 150ºc and wait until they turn black. Let them cool down and there you go, perfect for smushing!

This is another one of my favourite one-bowl recipes that comes together quickly and makes a small batch perfect for two or three (or just me!). One of the added benefits of a small batch recipe is that you don’t necessarily need a large oven. Kitchen space is an issue for most of us and that’s why I love the Wonderchef Crimson Edge 9-litre OTG . Its economic size will fit even the makeshift kitchenette I DIY-ed in my college room, and trust me, that was tiny! I use my oven almost every other day, often feeding a busload of family and friends so I definitely prefer Wonderchef’s larger OTGs like the Wonderchef 48-litre Stainless Steel OTG. Pick the size that’s right for you! Once you bake these awesome muffins in your new OTG you can also use it for a variety of recipes thanks to the various attachments that come with it. A good mixing bowl, the Ambrosia Stainless Steel Hand Whisk and the Ambrosia 6-Cup Metal Muffin Tray is all you really need to make these delicious muffins!

Let’s talk chocolate now. Good quality cocoa powder makes a HUGE difference to your muffins, so try and get your hands on some. Dutch processed cocoa powder will give your muffins an intense flavour but I’ve tried this with Hershey’s unsweetened cocoa powder and it still turned out divine.
You don’t need any fancy chocolate for the chunks. Just pick one that you like to eat! I used an entire bar that was 150g but you can go smaller as well. Since it’s more sweaty weather rather than sweater weather where I live, I always have trouble chopping chocolate. It melts faster than I would like so I usually stick it in the freezer for a few hours before I start baking. You could use a knife to chop your chocolate up but what I like to do is leave the chocolate in the foil and use a pestle to smash it into little pieces. I pick out some of the bigger ones to top the muffins with and the rest go into the batter.
So go forth and make these amazing muffins!
Makes 6-8 Muffins
Ingredients
- 1 1/2 Bananas
- 1/4 Cup Sugar
- 2 Tbsp Vegetable Oil
- 1 Egg (Substitute with 1/4 cup thick yogurt if needed)
- 1/2 tsp Vanilla Extract
- 1/2 cup Flour
- 1/2 cup Cocoa Powder
- 1 tsp Baking Soda
- 1/4 tsp Salt
- 150gm Chocolate Bar

Instructions
- Pre heat the oven to 170ºC
- Stick your chocolate bar in the freezer before you begin.
- In a large bowl, smush your bananas with a fork really well.
- Add the sugar, egg, oil and vanilla and mix well with a whisk and set aside.
- Sift the flour, cocoa powder, baking soda and salt into the wet ingredients.
- Fold the dry ingredients into the wet.
- Chop the half the frozen chocolate bar into small pieces and add to the batter.
- Line your muffin tray and fill until 3/4th full.
- Chop the rest of your chocolate into large chunks and top each muffin with a few pieces.
- Bake for 20-24 min at 170ºC. Test with a toothpick to see if they’re done. Alternatively, press the tops, they should bounce back when done.
- Allow to cool before digging in!
About the blogger
Sneha Sundar is the creator of You Dim Sum, You Lose Some; a philosophy she adopts both in and out of the kitchen!

No Comments