
What’s a valentine’s day celebration without something sweet? I’ve chosen the most romantic ingredient for this dessert. If you’re thinking strawberries or something else red, then you’re wrong because it’s coffee! It’s the drink of first dates, late night conversations and cozy mornings together. Good coffee isn’t just for sipping – it’s for savouring in layers!

The Three Layers
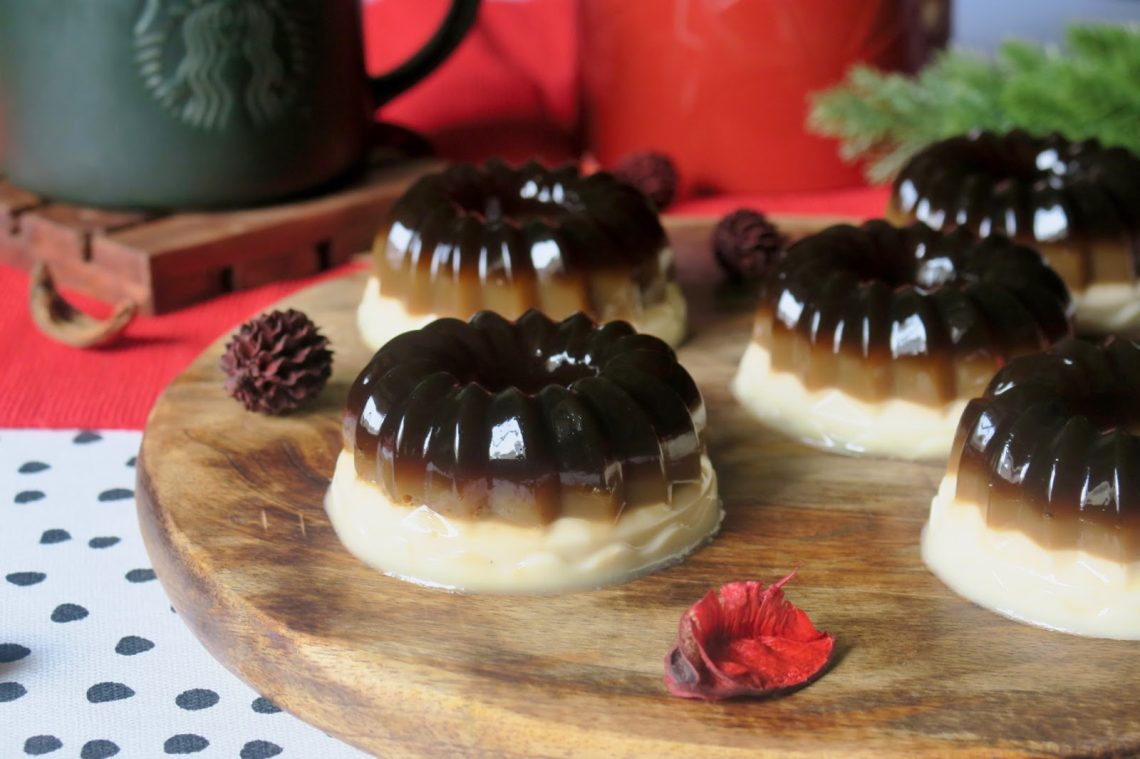
The three distinct layers are the highlight of this recipe and provide the visual wow factor. The first dark layer mimics a straight espresso, the middle layer, a latte and the last layer represents the foamy top of a cappuccino. However, this dessert, much like love itself, is all about subtext! The espresso layer reminds me of the intensity of love and passion. The harmonious middle layer symbolises balance while the top luscious layer shows love’s gentle, comforting side. When I pick a hero ingredient for a recipe, I like to go all out – subtext and all!

Equipment
This dessert begins with an espresso machine. The Wonderchef Regenta Espresso Coffee Machine 19 Bar should be the obvious choice! It’s got a classic dial that tells you when the pressure and temperature is perfect to start the brewing process. I was also pleasantly surprised with the manual nature of the machine which allows me to brew my preferred quantity of espresso instead of the standard 30ml that you get in automatic machines. I can’t lie – I’m not strong enough for a 30ml straight espresso shot! The machine is also super compact and will fit perfectly in any little nook of your office or home. With affordable prices and easy to use machines like this, you can open your own little cafe in your house.

Why Use an Espresso Machine?
Precision is the key to a great dessert, and an espresso machine ensures consistency. With perfectly extracted shots, you achieve a deep, balanced coffee flavor that shines in every layer. Plus, there’s something satisfying about using this powerful machine for more than just drinks!


The key to layering in this dessert is to set each layer at room temperature until it’s just set enough to pour the next layer. If you wait too long, the layers will separate. It will still taste and look great but you won’t get clean layers. You can make your life a whole lot easier by simply setting this in glass moulds so that you don’t have to de-mould them. Serve the dessert chilled and while it’s stunning enough on its own, you can pair it with some biscotti, a dusting of cocoa powder or for the coffee-obsessed, an espresso!

So the next time you fire up your espresso machine, think beyond the cup!
RECIPE CARD
Ingredients
Serves 6
Time: 30 minutes (10 min active)
Coffee Layers:
60ml strong espresso
¾ cup water
¼ cup sugar
¾ tsp agar agar
1.5 tbsp condensed milk
Milk Layer:
½ tsp agar agar
¼ cup Milk
¼ cup Cream
½ tsp Vanilla Extract
2 tbsp Sugar
Method:
- Mix sugar and agar in a bowl and add it to the Nigella Tri-Ply Sauce Pan along with the espresso and the water.
- Stir occasionally until the sugar is dissolved and the mixture comes to a boil. Ensure there are no bits of agar undissolved.
- Allow the mix to boil for 3-4 minutes.
- Take the mix off the heat and fill a silicone mini bundt mould about ⅓ of the way full. Keep aside to set at room temperature.
- Meanwhile, add the condensed milk to the remaining mixture and mix well.
- Once the coffee layer has set slightly (you should be able to touch the top without it sticking) Add the remaining mixture to fill another ⅓ of the way of the mould. Keep aside to set at room temperature.
- Repeat the process for the milk layer, boiling for 2-3 minutes while stirring constantly.
- Once the milk coffee layer is almost set, add the prepared mixture and fill until the tops of the mould.
- Let the jelly set at room temperature before refrigerating.
- Remove from the refrigerator right before serving. The jelly should pop right out of the moulds.

No Comments